
Are Home Security Systems Worth It? Understanding Security System Benefits
In an era where safety concerns are on the rise,

Keeping your house safe and secure is more crucial than ever in today’s rapidly changing environment. DIY home security systems have become a practical and efficient solution to safeguard your family and your possessions. Setting up your own home security system has never been simpler or more cheap thanks to technological breakthroughs. This article will walk you through the process of constructing a DIY home security system that works for you and gives you the security you need.
DIY home security systems offer several advantages over traditional, professionally-installed systems:
A typical DIY home security system consists of several key components that work together to provide comprehensive protection:
Assess Your Needs: Determine the areas of your home that require surveillance and the level of security you need.
Choose the Right Components: Select security cameras, sensors, and other devices based on your requirements. Ensure they are compatible with each other and can be integrated into a central control system.
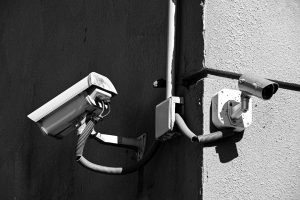
Placement is Key: Strategically place cameras, sensors, and motion detectors at entry points, blind spots, and high-traffic areas. Follow manufacturer guidelines for optimal positioning.
Installation: Most DIY systems are designed for easy setup. Follow the provided instructions or online tutorials to install cameras, sensors, and the control panel.
Connectivity: Set up a secure Wi-Fi network to connect your devices. Ensure strong, consistent signal strength for reliable operation.
Configure the System: Use the control panel or a mobile app to configure settings, test the system, and set up alerts and notifications.
Remote Monitoring: Install the mobile app on your smartphone to monitor your home in real-time, receive alerts, and control the system remotely.
Maintenance: Regularly check and test all components to ensure they’re functioning correctly. Replace batteries and update software as needed.
In an era where safety concerns are on the rise,
In today’s world, security systems play a crucial role in

Home security systems are essential for protecting your home and